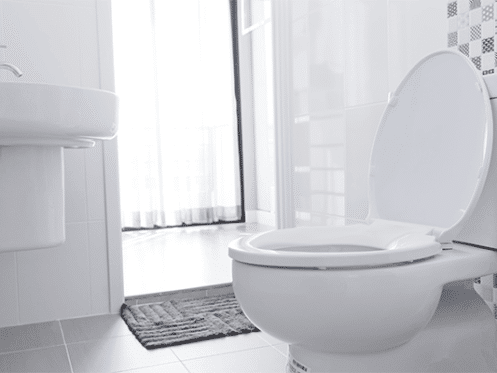
Have you noticed that your toilet rocks side to side or isn’t attached securely to the floor anymore? Perhaps you’ve seen water leaking from it or if you have an upstairs bathroom, you have water spots on the ceiling directly below it. Any of these signs can indicate that your toilet flange is broken and needs to be repaired or replaced.
The toilet flange is a type of pipe fitting that sits underneath the toilet and serves several important purposes. The first is that the flange connects the drain located within the floor to the toilet, which allows the toilet to be secured to the floor. It also works in conjunction with the wax ring to ensure water can’t leak out around it. In most cases, you should be able to easily repair or replace the flange without needing to hire a plumber. Here is a full guide explaining the steps.
1. Disconnect the Water Supply and Drain the Toilet
The first step is to shut off the water. There should be a shutoff valve at the wall where the hose runs from your plumbing into the toilet. Simply turn this valve counterclockwise as far as it can go. Next, flush the toilet several times until the tank is mostly empty.
There will still be some water left in the bowl. You’ll need to either soak it up with towels or suck it out with a wet/dry vacuum. Another option is to take your toilet plunger and force any water in the bowl down the drain. Finally, unhook the water hose from the tank. Before doing so, you may want to pile up some towels all around the toilet to soak up any water that might leak out anywhere.
2. Remove the Tank and Unbolt the Toilet From the Floor
The tank is mounted to the toilet with two bolts. Use a wrench or socket to unscrew the nuts from underneath the tank and then take out the bolts. After removing the bolts, gently lift the tank and set it to the side. Next, take the caps off that cover the flange bolts where the toilet connects to the floor so you can access the nuts and unbolt the toilet bowl.
Remove the nut from each side of the base and then gently move the toilet back and forth to loosen the wax ring from the flange and the bottom of the bowl. If there is sealant around the toilet, you will also need to cut through this with a knife before attempting to lift the bowl. Finally, lift the bowl off the ground and set it off to the side as well. You may want to cover the floor first to make sure you don’t scratch or damage your flooring.
3. Remove the Wax Ring and Inspect the Toilet Flange
With the toilet now removed, the next task is to scrape off the wax O-ring from both the flange and the bottom of the bowl. You should also remove any caulk left around the toilet or on the floor. With the wax ring gone, you should now be able to see if the flange is damaged. Usually, you’ll see that the flange is cracked or possibly broken into pieces. If the flange is still intact, this usually indicates that the leak was due to the wax ring being old, damaged, or otherwise not sealing properly. In this case, all you need to do is remove the old ring and install a new one.
4. Replace or Repair the Flange
If the flange is broken or otherwise damaged, you can choose to either repair it or possibly replace it. Replacing the flange is generally the best option. However, this is usually only possible if the flange is made from PVC and not glued, welded, or otherwise secured to the drain. In this situation, the flange should easily pull out of the pipe without much effort. If you can’t pull the flange out or if it is made from metal, you should hire a professional plumber to replace the flange instead. Otherwise, you might break the drainpipe, which will be a much more costly problem to fix.
The other option is to use a flange repair kit, which has a plastic ring that sits over the top of the broken flange. With a flange repair kit, all you need to do is set it over the top of the old flange, use the included screws to secure it down to the floor, and then seal between the two pieces with silicone.
If you decide to replace the flange, you’ll need to take out the old flange so you can measure the size of the drainpipe. Flanges come in different sizes so you’ll need to make sure that you get the right size replacement. You could also bring the flange to the hardware or plumbing supply store as this will make it easier to find the correct replacement part.
When you have your replacement flange, use the hardware that came with it to screw the flange down to the floor. If the flange didn’t include hardware, you can use either concrete anchors if the floor is concrete or wood screws if the toilet sits on a wood subfloor. After screwing the flange down, insert each bolt into the slots on the flange, and then secure each one with a washer and nut.
5. Attach the New Wax Ring and Reassemble the Toilet
Once the new flange or repair kit is in place, it’s now time to put on the new wax ring. The easiest way to do this is to turn the toilet over onto its side and firmly press the ring into place making sure that it goes directly over the hole on the bottom of the toilet. You can also attach the ring to the flange first, but this usually makes it more difficult to get the wax ring in the right spot on the bowl.
Once the wax ring is in place, align the flange bolts with the holes on the bowl and lower the bowl back into place. After setting the bowl, make sure to firmly press down on it to ensure the wax ring is sealed to both the bowl and the flange. At this point, you mustn’t rock or move the bowl as this could damage the seal on the wax ring and cause it to leak.
The last steps are to reattach the bowl to the floor and then bolt the tank back on. When doing this step, make sure not to overtighten the nuts on either the bowl or the tank since you could crack or damage the porcelain. If this happens, you’ll need to replace the entire toilet.
Once you have reassembled the toilet, you can reconnect the hose to the tank and then turn the water back on. If you did everything correctly, the toilet should be fully secured to the floor and free from leaks. Make sure to flush the toilet a few times just to ensure it doesn’t leak.
Expert Plumbing Repairs and Services
If you need help replacing your toilet flange or any other type of plumbing repair, our expert plumbers at AC by J are happy to help. We specialize in a full range of plumbing services including maintenance, leak detection, drain cleaning, and pipe repairs in Scottsdale, AZ.
Our team also works on water heaters, water softeners, filtration systems, and sump pumps. If you’re having any issues with your home’s heating or cooling systems or need to replace your furnace, heat pump, or AC, we have a team of certified HVAC technicians for that as well. We have been providing exceptional heating, cooling, and plumbing services to customers in the Scottsdale area for nearly 40 years. To learn more or to schedule a service appointment, give our specialists at AC by J a call today.


